

python+appium自动化测试-pytest+allure测试报告【建议收藏】
发布于2021-06-07 22:01 阅读(476) 评论(0) 点赞(28) 收藏(2)
来自APP Android端自动化测试初学者的笔记,写的不对的地方大家多多指教哦 之前发布的python+appium自动化测试-pytest+allure测试报告有不懂的朋友可以加软件测试群:175317069 ,群里大牛分享经验,还有海量免费的软件测试资源。
一、Allure安装
1、pytest和allure插件安装
- pip install allure-pytest
- pip install pytest
- 复制代码
2、Allure帮助文档
- https://docs.qameta.io/allure/#_about
- 复制代码
3、Allure安装
a.scoop install allure b.使用安装包安装
- allure官网下载:[github.com/allure-fram…]
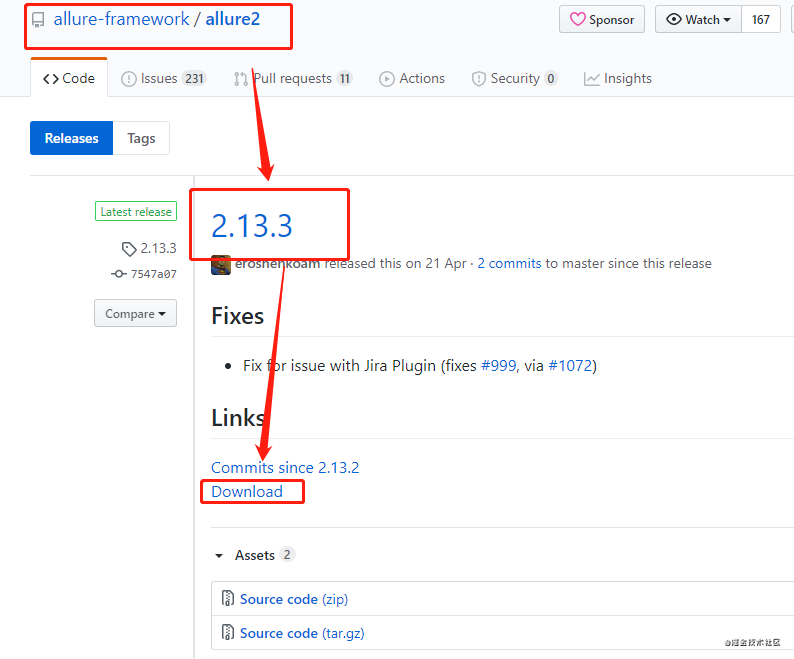
- allure2下载下来是一个zip的压缩包,我们要解压至自己的文件目录下(可解压放至项目的测试用例下或python安装目录下),自己可找到文件即可。
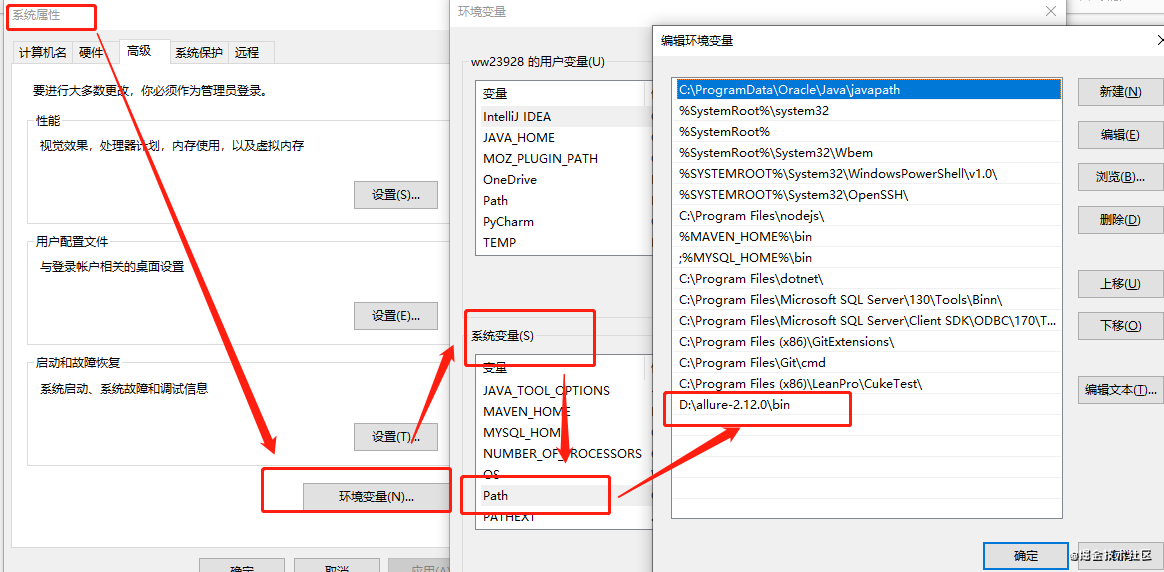
- 打开allure2目录,找到bin目录,复制bin文件目录, 然后进行环境变量的配置,设置环境变量的目的就是让系统无论在哪个目录下都可以运行allure2。
- 环境变量设置:(桌面——我的电脑——右键属性——高级系统配置——环境变量——系统变量——Path——编辑环境变量——把我们上面复制的目录路径新增至环境变量中即可)
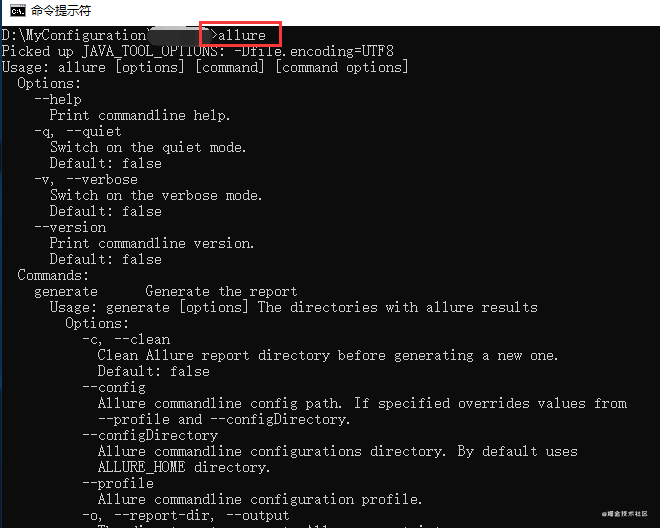
- 配置好后,打开cmd终端,输入allure,出现以下帮助文档,就说明配置成功了。
若后续有新版本,建议使用最新的版本
二、生成json格式的测试报告
运行环境:
- 设备:U4AIUKFAL7W4MJLR
- 测试app:微博APP(V10.12.0)Andriod版
- 测试功能:账号密码登录
方法一:在终端(terminal),生成json格式测试报告
终端(terminal)输入以下内容,运行
- pytest 运行的py文件 --alluredir=测试报告存放地址
- 例如:
- pytest add_weibo_test.py --alluredir=../report/json
- 复制代码
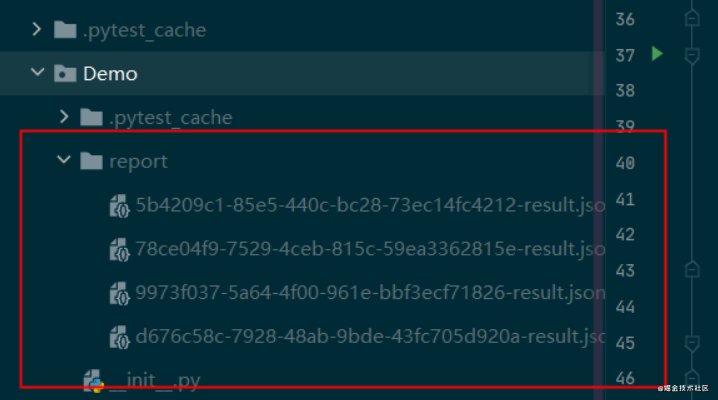
运行测试用例,在测试报告存放位置会生成一份或多份json或xml格式的测试报告

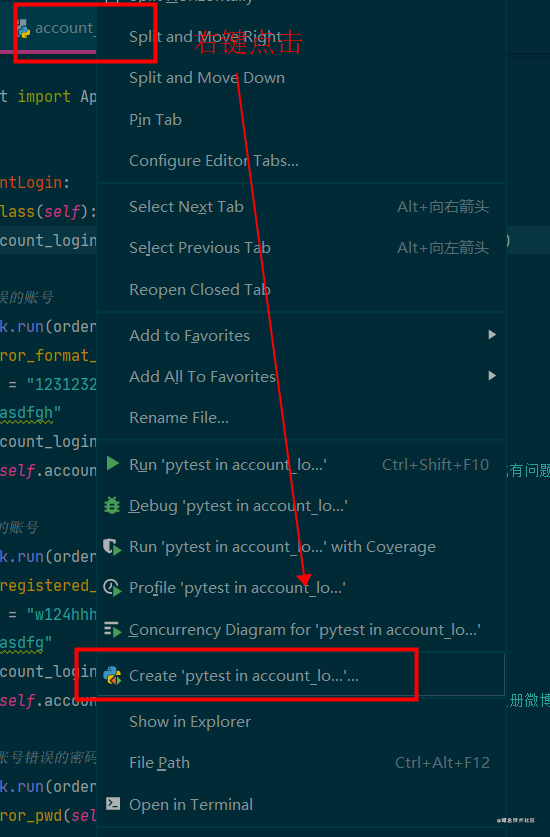
方法二:在测试用例配置Additional Arguments,生成json格式测试报告
1.选择需要运行的测试用例,右键点击Create Run Configuration:"测试用例文件名“
2.进入后在Additional Arguments输入:- -alluredir=生成的json格式测试报告存放的位置
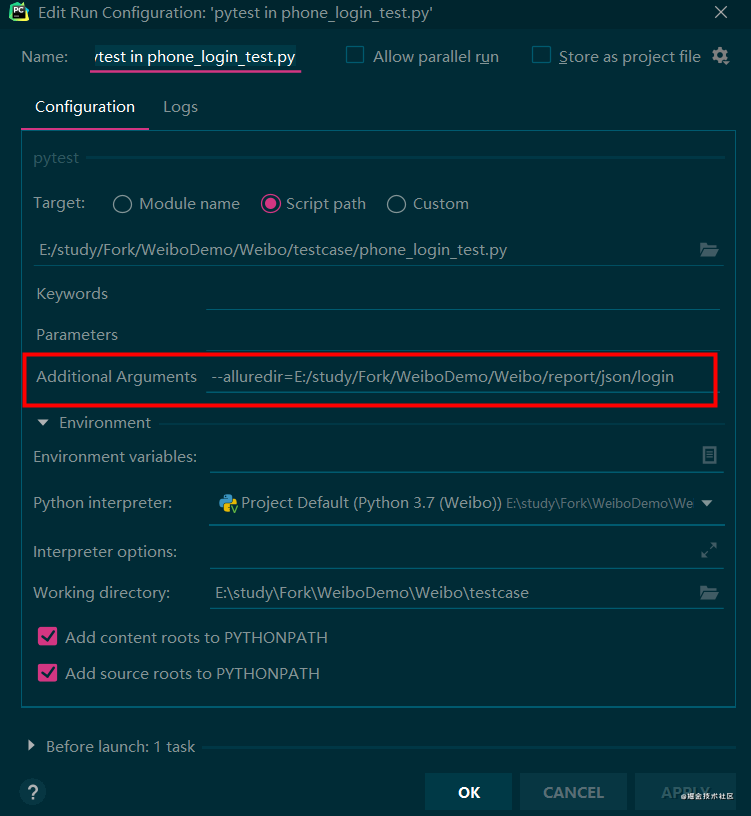
3.设置完后,点击APPLY→OK,在测试函数中运行测试文件
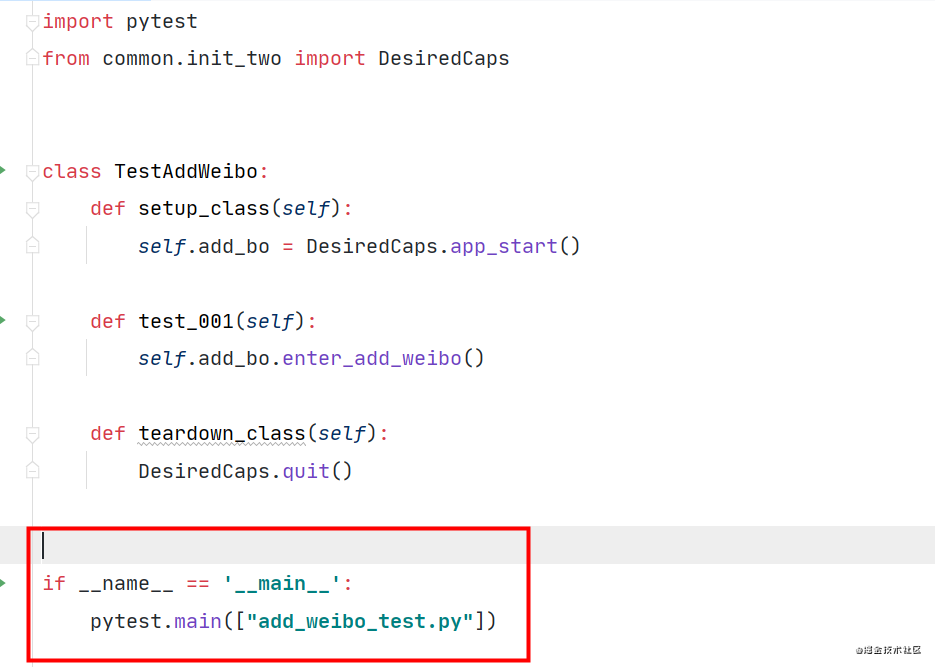
运行后在测试报告存放位置会生成一份或多份json或xml格式的测试报告
三、测试报告由json格式转换为html格式
在终端(terminal)转换
1.测试用例运行完成生成json格式的测试报告后,打开terminal,输入命令:
- allure generate ./report/ -o ./report/html --clean
-
- ./report/:表示执行需要转换的文件所在的位置,需要转换的文件在report文件夹中
- ./report/html:表示转换成功的html文件存放的位置,即存放在report下的html文件夹中
- --clean:表示清除之前的测试报告,因为重复生成相同的测试报告会报错
- 复制代码
注意:在terminal可以通过cd返回上一级或进入其它文件
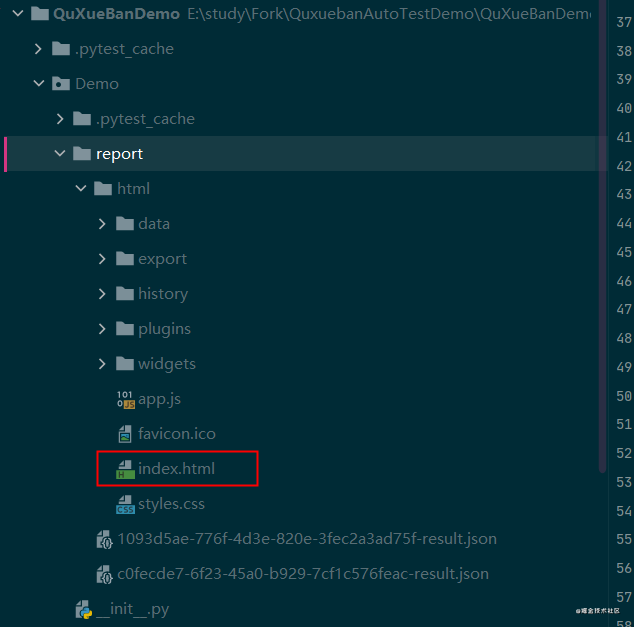
2.执行完成后,在report文件夹下会生成一个html文件,在html目录下会生成index.html文件,即为可视化报告,如下图所示
3.打开html文件,右键点击index.html文件,选择open in Broswer,选择Chrome浏览器,如下图
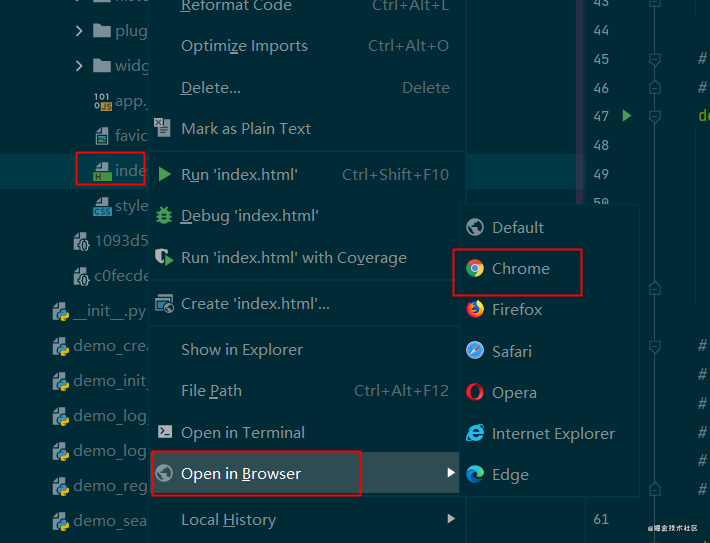
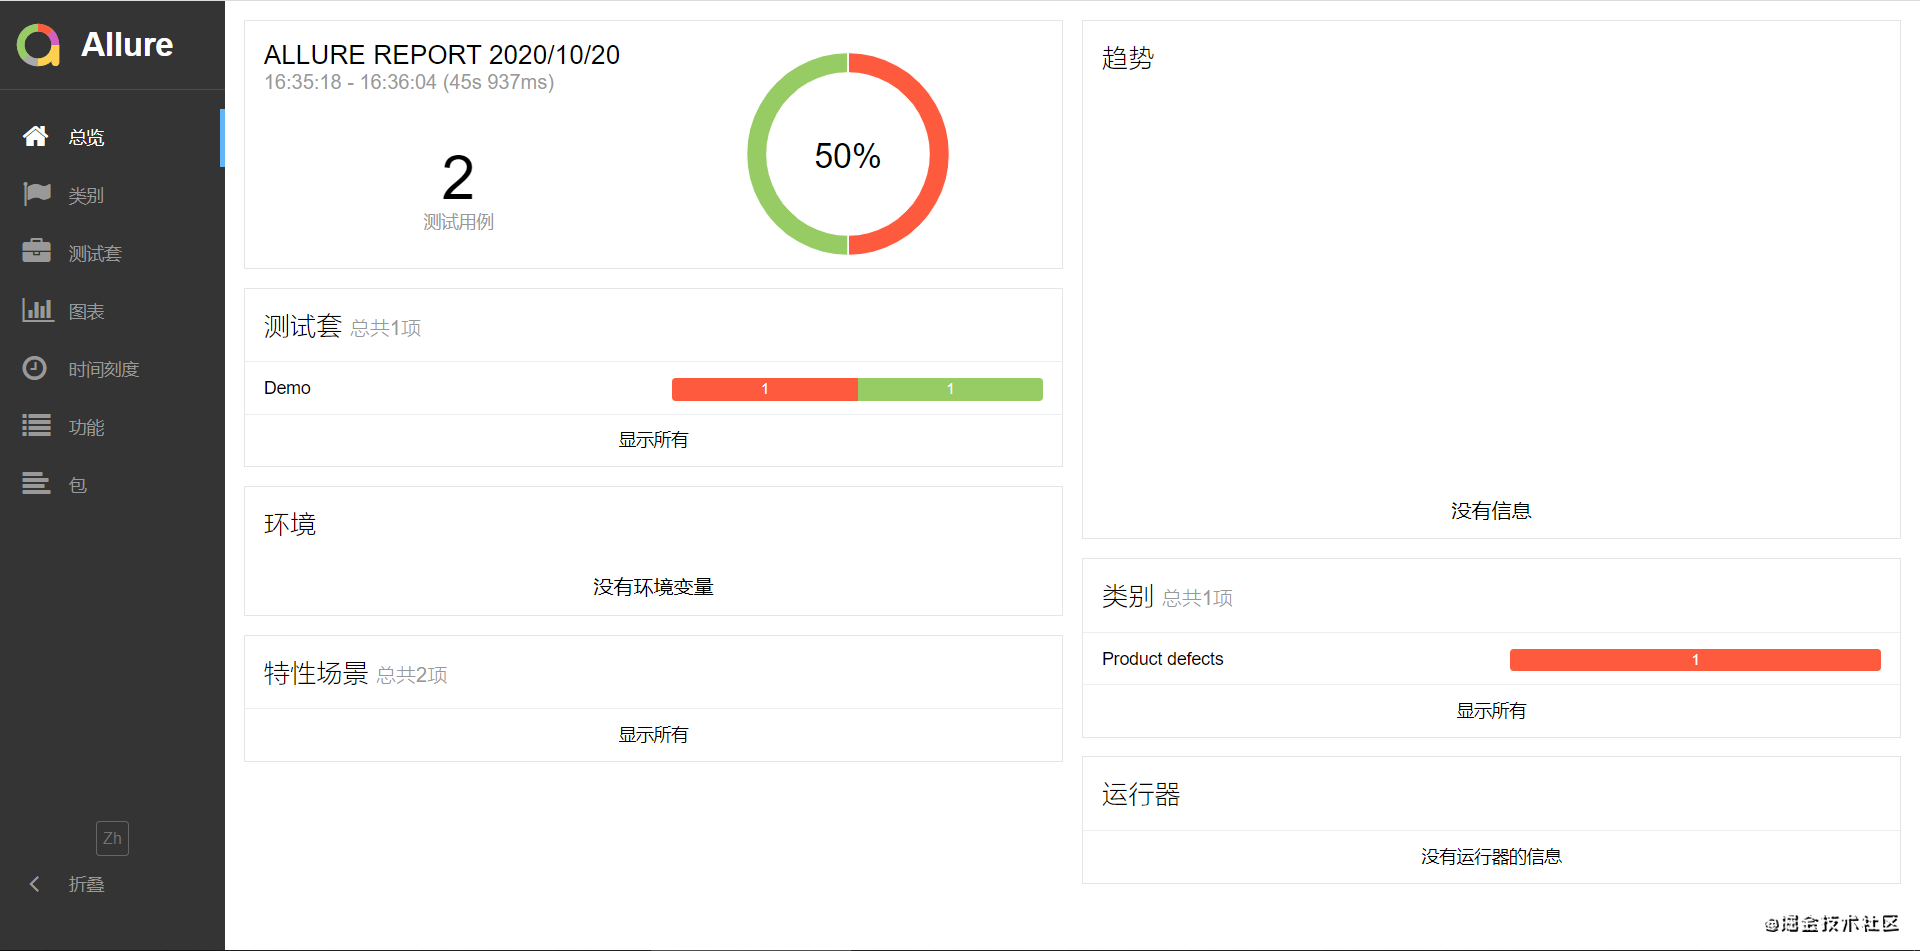
4.谷歌浏览器打开后的测试报告图片呈现为下图:
四、Allure相关注解
1. @allure.feature:用于描述被测试产品需求
2. @allure.story:用于描述feature的用户场景,即测试需求,与feature是父子关系
3. @allure.title:用户描述测试用例的标题,不设置默认为用例名称
4. @allure.description:用于对测试用例的一些附加描述
5. @allure.step:用于将一些通用的函数作为测试步骤输出到报告,调用此函数的地方会向报告中输出步骤
- with allure.step:用于描述测试步骤,将会输出到报告中
- allure.attach:用于向测试报告中输入一些附加的信息,通常是一些测试数据,截图等
代码如下:
- # 手机账号密码登录测试用例
- import allure
- import pytest
- from common.init import AppStart
-
- @allure.feature("这是测试feature")
- class TestAccountPwd:
- def setup_class(self):
- self.account_login_page = AppStart.start().enter_account_login()
-
- @allure.story("story_one")
- @allure.title("title_one")
- def test_one(self):
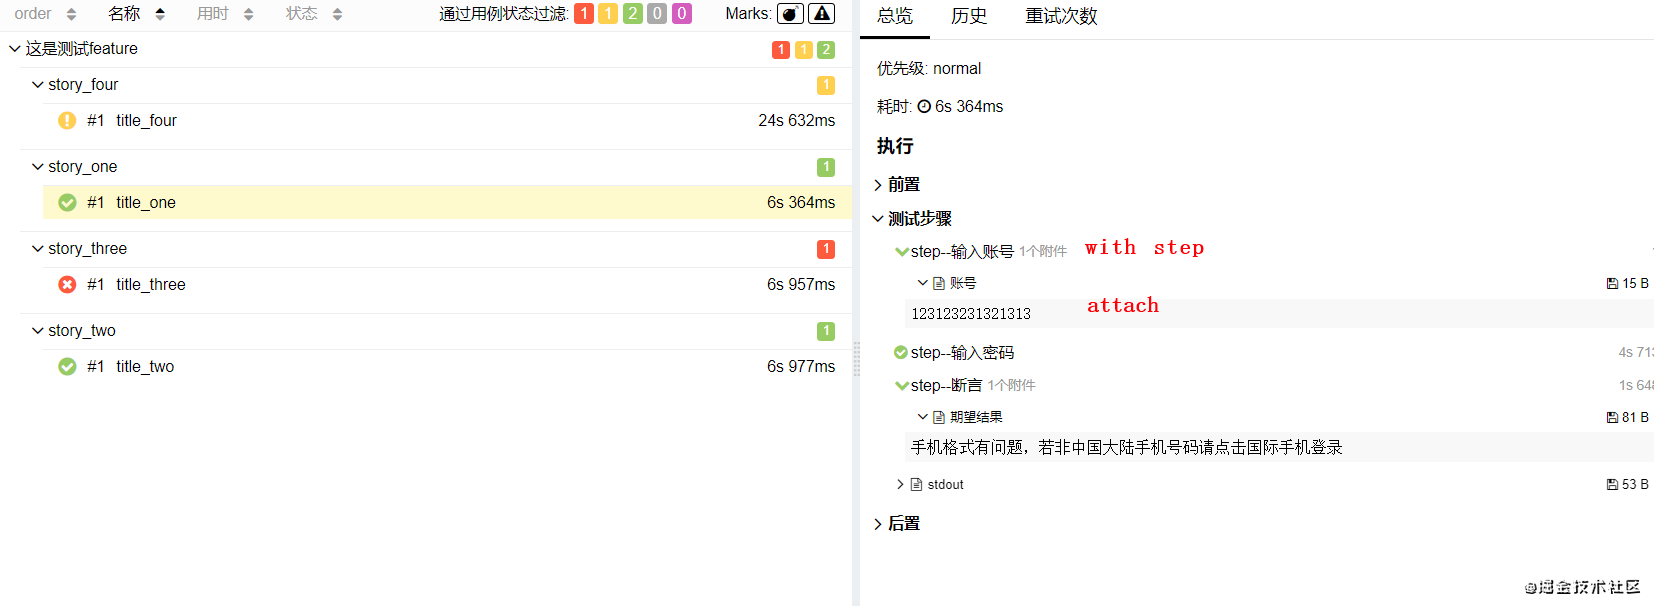
- with allure.step("step--输入账号"):
- allure.attach("123123231321313", "账号")
- account = "123123231321313"
- with allure.step("step--输入密码"):
- pwd = "asdfgh"
- self.account_login_page.input_account_pwd(account, pwd)
- with allure.step("step--断言"):
- allure.attach("手机格式有问题,若非中国大陆手机号码请点击国际手机登录", "期望结果")
- assert self.account_login_page.get_bounced_context() == "手机格式有问题,若非中国大陆手机号码请点击国际手机登录"
- print("\naccount的值:", account, "\npwd的值:", pwd)
-
- @allure.story("story_two")
- @allure.title("title_two")
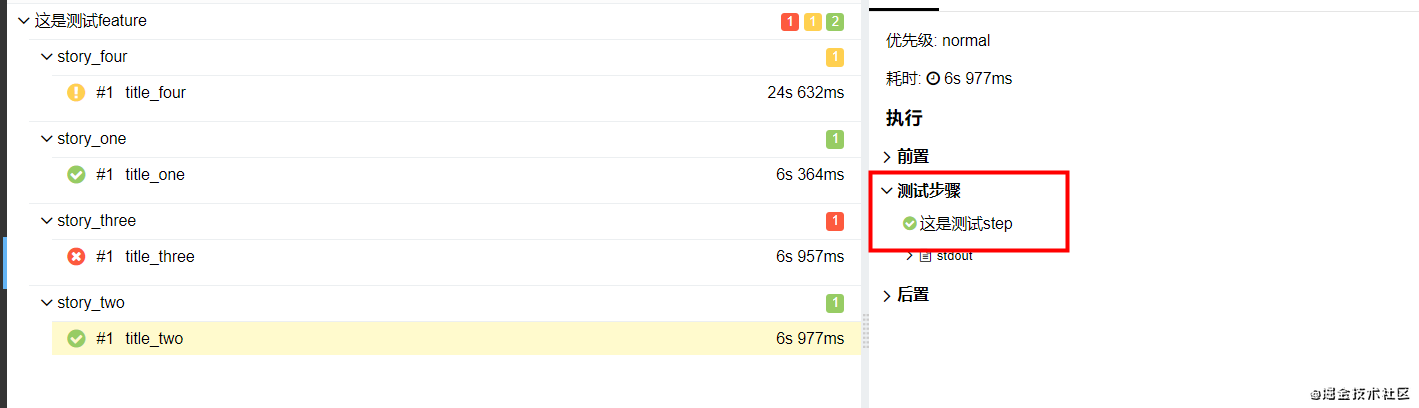
- @allure.step("这是测试step")
- def test_two(self):
- account = "w124hhh77"
- pwd = "asdfg"
- self.account_login_page.input_account_pwd(account, pwd)
- assert self.account_login_page.get_bounced_context() == "你尚未注册微博,是否立即注册"
- print("\naccount的值:", account, "\npwd的值:", pwd)
-
- @allure.story("story_three")
- @allure.title("title_three")
- def test_three(self):
- account = "hhhhhhhhh"
- pwd = "asdfg"
- self.account_login_page.input_account_pwd(account, pwd)
- assert self.account_login_page.get_bounced_context() == "你尚未注册微博,是否立即注册"
- print("\naccount的值:", account, "\npwd的值:", pwd)
-
- @allure.story("story_four")
- @allure.title("title_four")
- @allure.description("description")
- def test_four(self):
- account = "15059941156"
- pwd = "123123"
- self.account_login_page.input_account_pwd(account, pwd)
- assert self.account_login_page.get_account_pwd_tips() == "帐号或密码错误"
- print("\naccount的值:", account, "\npwd的值:", pwd)
-
- def teardown_class(self):
- AppStart.quit()
-
- if __name__ == '__main__':
- pytest.main(["account_pwd_test.py"])
- 复制代码
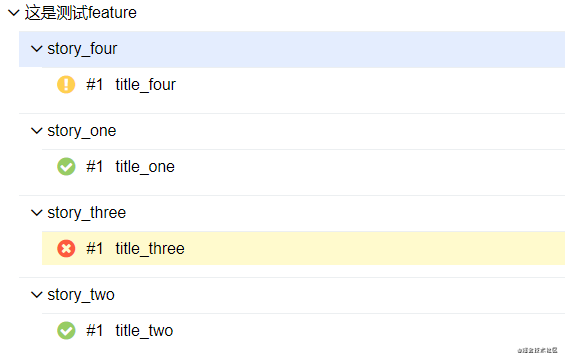
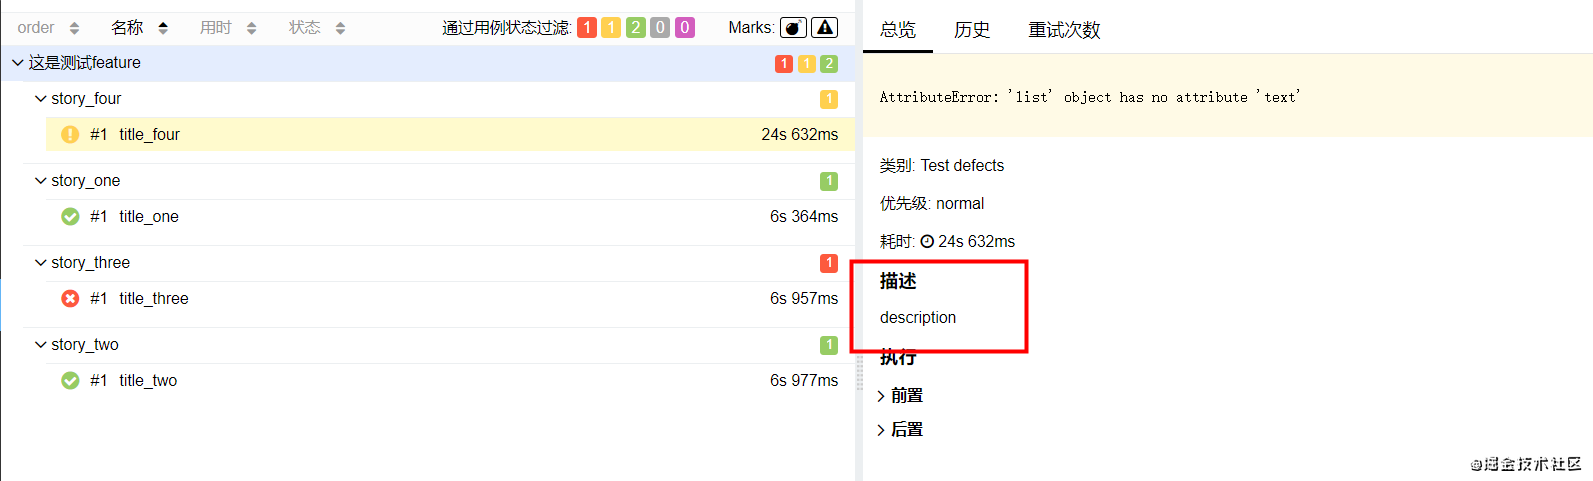
1.@allure.feature、@allure.story、@allure.title结果如下:
3.@allure.step结果如下:
4.with allure.step和allure.attach结果如下:
所属网站分类: 技术文章 > 博客
作者:来呀来呀开心吧
链接:http://www.phpheidong.com/blog/article/90143/e9dccca30552454f00cb/
来源:php黑洞网
任何形式的转载都请注明出处,如有侵权 一经发现 必将追究其法律责任
昵称:
评论内容:(最多支持255个字符)
---无人问津也好,技不如人也罢,你都要试着安静下来,去做自己该做的事,而不是让内心的烦躁、焦虑,坏掉你本来就不多的热情和定力